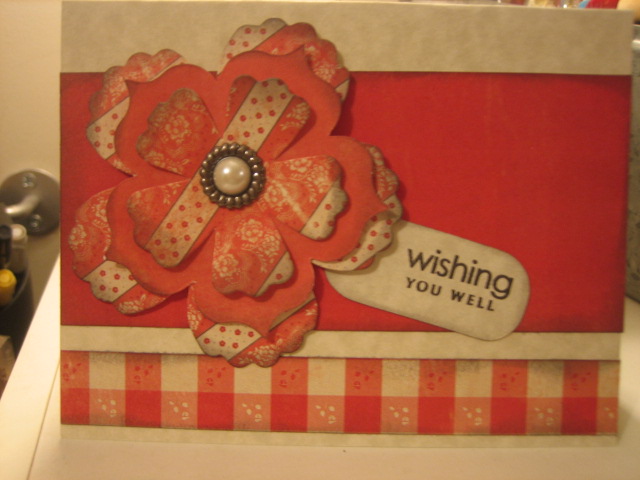
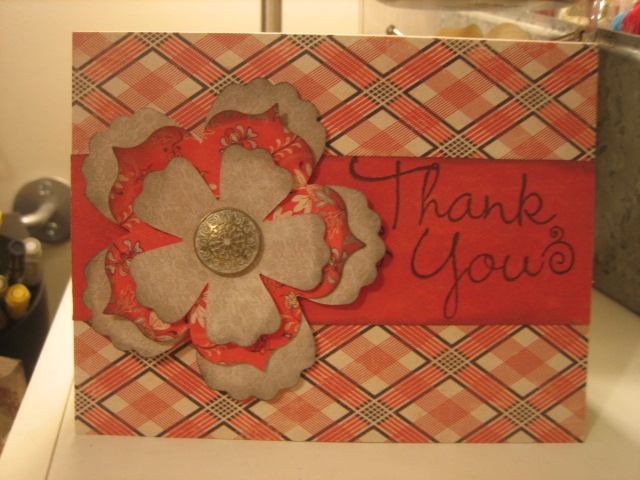
I absolutely love this paper! I found this 6x6 paper pack at my local scrapbook store and loved it so much, I went back and got another pack! The flowers are made with the Stampin' Up die Fun Flowers. I brads I used for these flowers are from Stampin' Up. Aren't they gorgeous? As a matter of fact, I used them all up and now need to get more! We did use this die last weekend for my flower class. This die is so versatile. I end up using it all the time to make quick flowers. I will have some more samples using this die with different materials. Thanks for stopping by.
Thursday, August 9, 2012
Monday, August 6, 2012
Felt Flowers
These flowers were another part of my flower class. These flowers were cut from the die Tattered Flowers by Tim Holtz. The brown is just regular felt from Hobby Lobby, the gold is a wool felt, which is more expensive, but cuts a little better.
The felt from these flowers is from PaperTrey Ink and so far is the best I have found! It is also wool felt and cuts beautifully. It has a much cleaner cut than the polyester felt. Be sure to check back soon for some more flower samples from my flower class.
Sunday, August 5, 2012
Glassine Kraft Paper
Finally! I'm back! Actually, I never left, but my blog seemed to. I was able to view my blog, but could not figure out how to post new information. I am not quite sure how I figured it out now, but I will worry about that later. I have been creating and have tons of samples to show, so let's get started. I just got back from a fabulous scrapbook weekend with my friends. They has asked me to teach a few "make n' takes" over the weekend. One of the classes I decided to do was a technique flower class. I wanted to show different ways to used different media to create fun flowers. Over the next few days, I will show you what I did. The first sample today is made from kraft glassine paper by Tim Holtz. The paper comes in 5x7 sheets (small stack of 36). For this sample, I die cut flowers from the Stampin' Up Fun flowers die. I then embossed them with a cuddlebug folder to get the swiss dots (or further below, the swirls). Last I used a cute Stampin' Up brad to attach the flower together. You can use a Stazon ink to ink the edges for a little more of a distressed look.
Monday, July 2, 2012
Yellow Polka Dots
Polka dots are always my favorite, but this yellow and gray has now been added to my favorites list! I used the set Apothecary Art and the framelits from Stampin' Up. The cute polka dot paper is from Close To My Heart. A very simple, but elegant card, plus it is easy to change the sentiment on the front, so it is also versatile. Thanks for stopping by, I hope to have more samples to show very soon!
Saturday, June 30, 2012
Paperbag Album Baby Girl
Wednesday, June 27, 2012
Shimmering Butterflies
I haven't been spending much time posting, but I have been creating. Here is a card I made last April (and finished up a few more today). The butterfly on this card was cut from the Stampin' Up die Beautiful Butterflies. After I cut the butterflies, I embossed them for added dimension. I then sprayed them with Glimmer Mist. The antennae is made with wire. I added two little pink gems on the butterfly body. The background was stamped with "Inspired by Nature" on some pattern paper, and the sentiment is from "Upsy Daisy" (both sets are retired Stampin' Up). This card has a soft elegant look to it. Thanks for stopping by. Hoping to have more time to post more ideas!
Saturday, June 16, 2012
Happy Father's Day!
I found these cards offered for free on the Cricut Craft Room. This site is free although you will need to download it on your computer when you are ready to cut. There are 5 free father's day cards this week. I am just learning how to use it, but so far, it is very handy. I am thinking this is a cross between the Gypsy and the Design Studio. I was told there would be a way to download (or upload) your cartridges which would incorporate both of the previous tools into one very convenient one. They have cartridges you can purchase and download as well as individual images. I will check back often with more information as I figure it out. As for now, these cards are fun and easy. The top tool card was cut several times on different colors of paper. I then mixed and matched different tool shapes (like a puzzle) and then matted the card. The second card was cut on double sided cardstock. Just fold the card after the cutting. I added a few embellishments, so quick and easy! If you have a Cricut, take some time to check out the Cricut Craft room.
Subscribe to:
Posts (Atom)
Create from a Kit
I'm always on the look out for these kind of cards. They are so easy to create from. By using a few tools and supplies from your sta...
-
I was playing around with my Cricut and I made these big tags using the Tags, Bags, Boxes and More cartridge. These jumbo tags (cut at 5...
-
I have no idea what inspired me to make this baby set. I think it started out using up some extra paper scraps! Do you ever go through t...
-
I have been meaning to post this picture (and I kept forgetting)! I made these a few months ago. I have been saving these paint chips to ...