Saturday, December 29, 2007
Technique Videos
Now that I have a little extra time to relax, I have been checking out other card making and scrapbooking blogs. I came across this site Paper Diva and found it very interesting and informative. Christine is based in Canada and not only has a blog, but she has a site for Video Techniques. I spent quite a bit of time watching some these. She does a nice job of introducing new products and demonstrating step-by-step techniques. It was like watching a five minute "Martha Stewart" episode. If you have a few extra minutes, check it out, just click on her site, Scrap Time!
Thursday, December 27, 2007
Holiday Gifts
Well, it is after the holidays and things are very relaxed right now (other than a little cleaning up after presents!). I am on vacation for two weeks and plan on spending some time in my comfy "jammies" with a lush new blanket from my daugher Tori, with a cup of Starbucks flavored coffee (from my other daugher Allie) - do they know me or what!! I have a stack of Paper Crafts, Paper Trends, and Cards magazines to relax with. I also have time to sit at the computer and put some of my ideas online.
I know it is after the fact, unless you haven't had all your holiday parties yet or maybe you can use these ideas for next year (you know it isn't too early to get started for next year!) Here are some holiday gifts I used.
 I made two of these little "doggie" gifts for Max's groomer and the owner. They take such good care of my little darling! I used the Doodle Charms (Cricut machine) to make the dog shown here. Just a little layering of paper and a few googlie eyes made this an easy craft.
  This snowman basket with matching cards was one of my favorites. I found the basket at Michaels and then designed the cards to match (and if you know me, you know that is how I design my baskets - around the containers!) I used my Cricut machine for the snowman (again Doodle Charms cartridge). I did a little sponging to antique the cards and the snowman.
 These cute little money cards made a nice gift (from my dad to all the grand-kids this year). I made sure to tell them "Don't throw that card away!! (I don't know if they listened!) Again I used the Cricut machine with the Doodle Charms cartridge. The stamp "I Believe" is from Stampassions. I stamped that near the top and added some clear glitter glue. On the inside I used the Stampin' Up punch (half circle) along the edge to create the money holder. I'm sure the kids were only interested in the "money" part, but I thought these cards turned out really cute!
 Until next time, thanks for looking!
Tuesday, December 18, 2007
Christmas Tins

 Wow, I can't believe it has been over a month since I sat down here to update! I guess things have been rather hectic. I have had a very successful "craft show" year. I'm glad I can share my cards and creations with so many people. I finished my craft shows for the season in early December and thought things would slow down, but I kept getting more orders for cards, albums and gifts. I haven't been very good at taking pictures of these things, but I do have a few to show you.
This is the latest gift I put together for some friends at work. Most of the cards were made with my Cricut. I had it "chirping" all weekend. I found the tins at our local grocery store and then designed cards to match.
Wow, I can't believe it has been over a month since I sat down here to update! I guess things have been rather hectic. I have had a very successful "craft show" year. I'm glad I can share my cards and creations with so many people. I finished my craft shows for the season in early December and thought things would slow down, but I kept getting more orders for cards, albums and gifts. I haven't been very good at taking pictures of these things, but I do have a few to show you.
This is the latest gift I put together for some friends at work. Most of the cards were made with my Cricut. I had it "chirping" all weekend. I found the tins at our local grocery store and then designed cards to match.


Monday, November 12, 2007
Festive Favorites
 This card is made from the Stampin' Up set "Festive Favorites". Although the large stamp has a row of snowmen, a row of christmas trees and a row of reindeer, I cut them apart and use them separately. Also shown is the same stamp with the snowmen.

Sunday, November 11, 2007
Larger Birthday Calendar

 Here is a picture of the birthday calendar I made. It is 81/2 x 11 inches. Pictured are the cover and the first page.
Saturday, November 3, 2007
Make a Wish

 I was excited to use my new set Big Bold Birthday from Stampin' Up. This is basically the same layout. One card opens from the top, the other from the bottom. Each have a ribbon accross the middle with the cupcake off to the side.
Friday, November 2, 2007
Hope Your Birthday Rocks!

 These cards were fun to make (and hopefully fun to receive). I am always trying to think of birthday cards for kids, and thought the "Pop Rocks" candy might be something fun. I thought the color could be boy or girl. For one card I stitched a pocket on front to stick the candy in. On the other card, I just attached the candy to the card front. I also made these in lime green (for the watermelon flavor candy). TFL!
Wednesday, October 10, 2007
Turkey Time!

 Well, I put some Halloween cards up, and didn't want to skip right into Christmas,so here are a few Thanksgiving cards. The first turkey card I made using different pattern papers. The second card I made at my friend Connie's house. This card was made using mostly punches (oval, heart, square and word window)! How cute! I think I am going to do this as a project with my first grade students!
Wednesday, October 3, 2007
Spiders!

 My Cricut has been chirping away! I made these cute spiders for a project at school and had to make some cards with the left overs! I found the paper at my local scrapbooking store and I used some decorative scissors for the border on the bottom. I added a little ribbon and of course some "wiggley" eyes for the final touch! The long sentiment on the bottom is from Savvy stamps and the sentiment in the top right hand corner is from Stampin' Up.
Tuesday, October 2, 2007
Pumpkin Pockets

 Here are a few old library pockets I wanted to use up. They were a little on the bright side (orange and yellow), so of course, I thought - Halloween! I found these cute pumpkin stickers at Michael's. They are glittery! Add a little decorative ribbon on the pocket and some to match the pull-out card - I just stapled the ribbon onto the pull-out tag. Quick and easy - my kind of card! Thanks for stopping!
Monday, October 1, 2007
Here kitty, kitty, kitty!

 Wow! Where has the time gone??? If it weren't for Robyn asking where I am (and missing me :) !!), I would still be lost in housework, paper work and card scraps!!! (Now most of you that know me, you know I am not lost in housework - what's that?!) But work and cardmaking (to keep up with craft shows) has been keeping me busy! Here are a few things I have been working on. Who wouldn't love these cute little kitties sitting on their porch!! I love these vintage cards. I am on the lookout for some vintage snowman pictures. If there is anyone out there that can direct me in the right direction, drop me an email at madebyme2@yahoo.com.
Well, that is all for tonight, I do have more halloween cards to post tomorrow! Thanks for looking and check back soon!
Wow! Where has the time gone??? If it weren't for Robyn asking where I am (and missing me :) !!), I would still be lost in housework, paper work and card scraps!!! (Now most of you that know me, you know I am not lost in housework - what's that?!) But work and cardmaking (to keep up with craft shows) has been keeping me busy! Here are a few things I have been working on. Who wouldn't love these cute little kitties sitting on their porch!! I love these vintage cards. I am on the lookout for some vintage snowman pictures. If there is anyone out there that can direct me in the right direction, drop me an email at madebyme2@yahoo.com.
Well, that is all for tonight, I do have more halloween cards to post tomorrow! Thanks for looking and check back soon!
Wednesday, September 12, 2007
Tie One On!

 "It's your birthday, tie one on!" I need to find a sentiment stamp like that one to go with these cards! I needed some more masculine birthday cards and I thought these would "fit the bill!" (I don't know what's going on with all these puns, I must be slap happy!!)
I first found the big "ties" stamp a few years back and then found the little ties at the spring stamping convention and thought it was the perfect size to use on the envelopes to match the card. For these two cards, I went with a black and cream theme with a touch of gold. (I used gold embossing powder and then just a little gold glitter glue.) Hope you like them. Thanks for looking!
"It's your birthday, tie one on!" I need to find a sentiment stamp like that one to go with these cards! I needed some more masculine birthday cards and I thought these would "fit the bill!" (I don't know what's going on with all these puns, I must be slap happy!!)
I first found the big "ties" stamp a few years back and then found the little ties at the spring stamping convention and thought it was the perfect size to use on the envelopes to match the card. For these two cards, I went with a black and cream theme with a touch of gold. (I used gold embossing powder and then just a little gold glitter glue.) Hope you like them. Thanks for looking!
Monday, September 10, 2007
Froggie Card
 Just playing around with my sizzix and my cuddlebug embossing folder. There are so many possibilites with these toys! I liked the colors of this card together. The polka dot pattern paper and the polka dot ribbon add just the right amount of design to this simple card. TFL!
Friday, September 7, 2007
Happy Birthday!

 Happy Birthday to two of my very dear friends (Sherry and Teresa)! Hope your day was special - I was thinking of you both! For these cards, I used the Cricut to cut the scallop circle and the cupcake stamp is from Michaels. The black polka dots were made with a jumbo black marker.
Thursday, September 6, 2007
Welcome Back!
I'm back!!(Thank you to the people asking about where I have been!) Well, I've been right here, but I got caught up in all the "back to school" stuff. Not only setting up and preparing a classroom for a new grade, but all the shopping for two teenage "high school" girls (and myself). We also had a family wedding (my nephew) and out of town relatives. But... I am starting to get into the swing of going back to work and organizing my time again. Plus I had some fun craft projects that I couldn't post before hand (because I knew some of the receivers would be checking out my blog and didn't want to ruin the surprise!) So now that they have all received their "welcome back" gifts, I can share the story and the pics! It all began last spring at a staff luncheon when someone saw the empty drink holder on the table and tossed it at me and said "I bet you can make something out of this! The joke was sort of "from trash to treasure"! I said "Don't be surprised to find this on your desk the first day back to school." All of a sudden, two more people ran for the trash and threw two more drink holders at me! Well, I saved them all summer and this is what I did to "fix" them up!

 I cut the letters from my Cricut (Mickey Font)and covered the boxes with pattern paper. One holder has an M&M theme (found at Michaels), another has a school theme (pencil die cut is from my sizzix), and the last one just had kind of a "any occassion" theme. I think they were a big hit (and a big laugh) the first day. One person even said she was going to go home and find other things for me to "re-decorate"!
Keep checking back - even though I didn't post for a while, I was busy creating! Thanks for looking!
I cut the letters from my Cricut (Mickey Font)and covered the boxes with pattern paper. One holder has an M&M theme (found at Michaels), another has a school theme (pencil die cut is from my sizzix), and the last one just had kind of a "any occassion" theme. I think they were a big hit (and a big laugh) the first day. One person even said she was going to go home and find other things for me to "re-decorate"!
Keep checking back - even though I didn't post for a while, I was busy creating! Thanks for looking!
 It all began last spring at a staff luncheon when someone saw the empty drink holder on the table and tossed it at me and said "I bet you can make something out of this! The joke was sort of "from trash to treasure"! I said "Don't be surprised to find this on your desk the first day back to school." All of a sudden, two more people ran for the trash and threw two more drink holders at me! Well, I saved them all summer and this is what I did to "fix" them up!

 I cut the letters from my Cricut (Mickey Font)and covered the boxes with pattern paper. One holder has an M&M theme (found at Michaels), another has a school theme (pencil die cut is from my sizzix), and the last one just had kind of a "any occassion" theme. I think they were a big hit (and a big laugh) the first day. One person even said she was going to go home and find other things for me to "re-decorate"!
Keep checking back - even though I didn't post for a while, I was busy creating! Thanks for looking!
I cut the letters from my Cricut (Mickey Font)and covered the boxes with pattern paper. One holder has an M&M theme (found at Michaels), another has a school theme (pencil die cut is from my sizzix), and the last one just had kind of a "any occassion" theme. I think they were a big hit (and a big laugh) the first day. One person even said she was going to go home and find other things for me to "re-decorate"!
Keep checking back - even though I didn't post for a while, I was busy creating! Thanks for looking!
Wednesday, August 15, 2007
Birthday Tin

 I decided to try some of those cute lunch tins. The project is a little "trying"! I had a hard time keeping the ribbon on. I looked up and read a lot of different directions for making these, and one person used glue dots to keep the ribbon on. DON'T try that, the ribbon kept popping off. I am still not sure how to attach it. I modge podged the tin after I had the paper on, but wasn't sure if I should modge podge the ribbon. Anyone out there that has tried this, please comment and let me know. For this tin, I just found some primary color pattern paper. I used the Cricut to cut "birthday". After I had everything on, then I brushed on a layer of modge podge. I made some file cards for the inside with each month across the top and lines to list birthdays for that month.
Wednesday, August 8, 2007
Think Pink!

 I found these purse boxes at a scrapbook store and thought I would try to decorate some. You can find these at Eclectic Paperie under "alter this" by Bare Elements. (PS they are on sale right now!) I went with a "girly pink purse" theme with matching cards. The paper I used for these is from Close to my Heart.
 The stamp set I used is "Fashion First" from Stampin' Up. The sentiment on the purse box "Good friends are the best accessories" is from Stampendous. Well, I'm off to make more boxes, plus my cards for card club tomorrow. So much crafting to do, so little time! Thanks for looking! TTFN!
Saturday, August 4, 2007
Princess


 Again, sorry I haven't been posting lately, but I have been busy creating! I have all kinds of new stuff to show you as I get ready for my next craft show. Here is are a few "Princess" things I have been working on. I found these Princess post it notes at Michaels. I embossed the crown from Oh My Word (Stampin' Up) and the sentiment Make a Wish (Penny Black) in silver. The bag and the iron on crown both came from Hobby Lobby.
Sunday, July 29, 2007
Elegant Birthdays

 I was going for a different look with these cards. It seems that most of my cards are more on the "cute" side, other than elegant. And of course with all the flower sets of stamps I have, I thought I should be able to muster up something more along the this line. The Daisy card is just made from a pattern paper (remember this Stephanie?) found at Joann Fabrics in one of those "grab" bag kits with a little of everything (they are trying to get rid of!). I just loved this sparkle glitter paper. I thought it had enough on it already, so I just added a sentiment and a little ribbon. The other card is made using the set Easy Elegance from Stampin' Up. I thought with a name like that, it should be easy! It was, I just made some simple flowers on this card, along with some Basic Grey cardstock. A little glitter in the flower and middles and again some ribbon.
Saturday, July 28, 2007
Monkey Business!

 Wow, it has been a few days since I last posted anything. I don't know what I have been up to (being lazy I suppose). The weather has been hot and humid and quite cloudy. Not really good for much other than staying in the air conditioning (and making cards!) I really have been busy restocking my cards and paper crafts for an upcoming craft show. Here are some darling stamps I found at Eclectic Paperie. These monkey stamps are made by Stampendous and you can find them under the name Changito. I have been making birthday cards lately, so I added a birthday sentiment to these. Watch for a few more monkey cards coming up soon!
Tuesday, July 24, 2007
Paint Chip Ribbon Holders
 I have been meaning to post this picture (and I kept forgetting)! I made these a few months ago. I have been saving these paint chips to craft with and thought I better get to it! I first glued the paint chip to a piece of cardboard to make it more like chipboard. After they dried, I hand cut little grooves, or half circles along the edges to wrap the ribbon around. I distressed the edges and found some coordinating ribbon and fibers. I added a little tag at the top of one held by a clip. The other two have eyelets at the top with ribbon through them. I thought these would be a good gift for a friend or a great hostess gift. It is also a good way to use up some of that left over ribbon or fiber. Thanks for looking!
Subscribe to:
Posts (Atom)
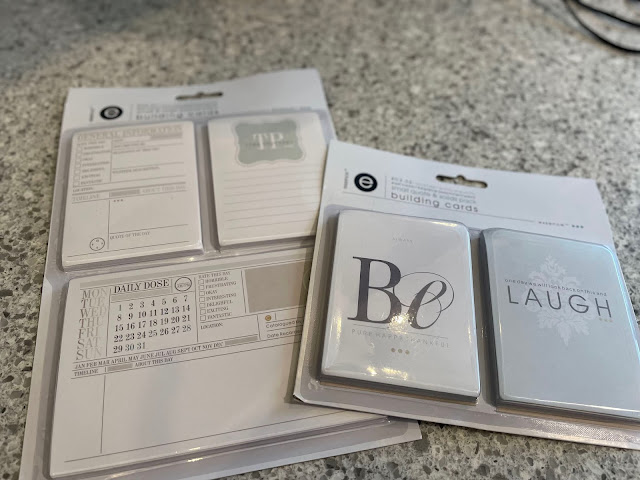
Create from a Kit
I'm always on the look out for these kind of cards. They are so easy to create from. By using a few tools and supplies from your sta...
-
 I was playing around with my Cricut and I made these big tags using the Tags, Bags, Boxes and More cartridge. These jumbo tags (cut at 5...
 -
 Well, this was new to me. I have never made a wedding planner binder before. As a matter of fact, when I went online to get some ideas...
 -
 And Andrea, if you're out there, you know what I am talking about! I saw you at the funny farm today. There are only 13 more days of...