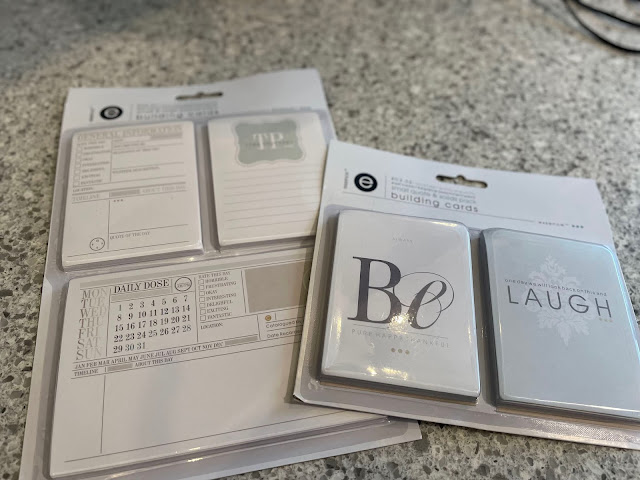
Those were some samples from last year’s find, and then look what I found this week..., another huge package! Look at all the little bags, filled with tags and trinkets, I wish I would have taken a picture before I opened it! This vendor packages her items beautifully! I can’t wait to start creating!
Wednesday, December 18, 2019
Vintage Christmas
I’m always on the lookout for vintage paper crafts, I love the 60’s and 70’s look (probably for nostalgia purposes)! A great place to find these original images at a reasonable price are resale shops. Antique stores, not so reasonable prices! Many of these images are from a resale shop. The vendor packages a huge variety of vintage Christmas items, scrapbooking related, a treasure of a find for someone like me, someone who loves to sort through “grab bags” looking for ways to repurpose!
Sunday, December 8, 2019
Made By Me - Techniques 101
I can't believe how fast the time has gone, and why haven't I been posting my creations!! I have been having classes quite regularly and I haven't even posted any of my creations, so here is the information from my last class a few weeks ago!
WATERPROOF DYE INKS/ ARCHIVAL DYE INKS
CHALK INKS
Made By Me
Technique 101 – All about Ink
For whatever you’re planning on stamping, it
helps to know the basics about different rubber stamp inks and their uses. This
ensures you’re using the right ink type for the job – whether it be paper,
wood, plastic or fabric you’re going to be stamping on. Below are some of our
key considerations for selecting the right ink for your custom project.
DYE-BASED INKS
For most types of paper, dye-based rubber
stamp inks are your best bet. It dries incredibly quickly, and is considered a
good all-round ink. Dye based inks have a consistency that is similar to water.
These inks are generally not waterproof, so you need to ensure you do not use
on top of any water-based mediums, such as pens or paint, because the inks may run
or bleed together.
WATERPROOF DYE INKS/ ARCHIVAL DYE INKS
These types of ink have a different base so that when they're dry you
can color with markers and watercolor over them and they won't bleed or smear.
These inks are great for line images that you want to color in, and these inks
tend to be more colorfast than their regular dye ink counterparts. These inks
tend to be more difficult to clean off of your stamps and may require a special
cleaner to fully remove the ink.
PIGMENT INK
Pigment inks are a lot thicker than dye inks and generally have a
glycerin base. Regular dye inks are more
"liquid" and transparent, pigment inks are opaque and thick. Pigment
inks almost always come with a spongy foam pad to enable the ink to be picked
up easily by the stamp. Because it's a thicker ink these pads dry out faster
than dye inks and need to be refilled more often. These inks are great for stamping on card
stock, and a great thing about them is you can stamp lighter colors on darker
card stock and the ink color will show. Pigment ink tends to "sit" on
top of the card stock and takes longer to dry, so it's great for embossing. These
inks are generally fade-resistant and are good for scrapbooking, but they generally
require heat setting to dry fully. These
inks don't work well on nonporous surfaces.
EMBOSSING
INK
These types of rubber stamp inks come in pads
that are generally clear and are a sticky glue-like substance. These inks, like the pigment inks do not dry
quickly. They are often used in
conjunction with embossing powders and a heat gun. You
can also use this type of ink to stamp the image on colored cardstock and let
dry for a slightly darker image (watermark).
“VersaMark” is a common brand name, although many companies offer a
similar product under different names.
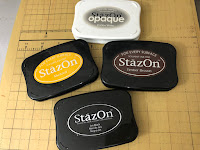
Permanent
Inks
When it comes to being the ultimate in
permanent ink, StazOn brand is a good choice. You can use it on paper, metal,
glossy paper, leather, ceramic, glass, transparencies, and even on plastic. When
using on a non-porous surface, it only takes 5 minutes to dry, it is archival
safe, and even acid-free, making it an excellent choice for scrapbookers.
DISTRESS
INKS/Distress Oxides
Distress Inks are water-based dye inks but deserve a category of
their own because of their rather unique properties. Even though they are
water-based they dry slower than other water-based dye inks. They also react
with water, enabling all sorts of techniques. They blend well together and
blend well with water to produce different effects.
CHALK INKS
Chalk inks are usually similar to pigment
inks but with a “chalkier” finish. They usually dry faster than pigment inks (but
not as quickly as dye inks) and are acid-free and archival safe so great
for scrapbooking. They are permanent when heat set. With their matte chalky
finish, they look great on darker card stock.
KALEIDACOLOR DYE
INKS
These water-based Rainbow Dye Ink Pads come
with 5 different colors in one pad with a sliding mechanism to keep colors from
bleeding when not in use. Slide the colors together to get a unique blending of
colors when stamping. This is a wonderful pad for use with your brayer to create
stunning and simple backgrounds.
Acrylic Stamps
Acrylic stamps are less expensive and “cheaper” than
photopolymer and are “stretchier” to the feel. They are generally lighter in
weight than photopolymer. You need to be
careful when removing the stamp from the plastic sheet, they can tear, and in
time these stamps can lose their ability to stick to acrylic blocks (they seem
to collect lint and dirt). Older stamps will sometimes get stuck to the
backing sheet if they are and will tear when you try to pull them off.
When you ink up an acrylic stamp, the ink tends to “bead up” on the stamp and
therefore, when you stamp, you do not get a crisp, clean impression. It is
usually “blotchy” and uneven. There are a few things you can do to make
them stamp better; inking the stamp first with VersaMark ink and then with your
colored ink or gently rub an eraser on the stamp before stamping may help. Most acrylic stamps are made in China
Photopolymer Stamps
Photopolymer stamps are higher quality. Photopolymer stamps are
made to transfer ink so the ink sticks to the stamp extremely well, giving you
a crisper, cleaner image. They are heavier and less stretchy than acrylic.
Since they are of better quality, the price index is generally higher as
well. Most of the larger companies use
photopolymer. Photopolymer stamps are usually made in the US.
(Both of the above stamps require an acrylic block or a stamping
platform to use)
Wood Rubber Stamps/Cling Stamps Wood stamps are made from a red
rubber. They do not need a separate
block to stamp with since they are permanently attached to the wood block. They stamp very clear and crisp, the downfall,
these stamps are more difficult to work with; you are not able to see clearly
where you are stamping. They are also
more difficult to store. Cling stamps are the same red rubber quality, but do
not have the wood block. These stamps do
require an acrylic block or stamp platform.
Again, these are crisp, clean images, but more difficult to use.
Acrylic Blocks/Stamping Platforms
Acrylic blocks are
used with rubber stamps that are unmounted (from wooden blocks), cling stamps
or clear stamps (polymer or acrylic).
These blocks come in a variety of different shapes and sizes and can be
purchased through most stamping companies or big box stores. Some blocks are clear, some have grid lines
(these are helpful). A stamping platform
is and innovated way to stamp with either clear or cling stamps without an
acrylic block. It allows you to stamp
multiple times and get an accurate and precision image. There are several different platforms by different
companies (and each company has a unique platform for their company). Common/popular platforms include the “MISTI”
(by My Sweet Petunia), Tim Holtz platform (by Tonic Studios – no longer in
production, but can still be found), Crafter’s Companion, and the Stamparatus
(by Stampin’ Up).
Monday, August 19, 2019
Heartfelt Creations
I was able to tour the factory and headquarters of Heartfelt Creations today in Indiana! What an amazing company! This family business is not only successful, but genuinely generous and kind by giving back not only to the community, but others in need. I truly enjoyed learning more about this company today and look forward to using their products in my creations and future classes. Stay tuned for up coming cards for my next class!
Sunday, July 7, 2019
Saturday, April 6, 2019
Wedding
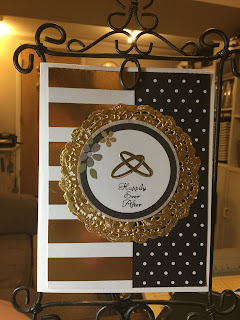
Here are a few wedding cards I made. These are blank pictures inside, so they could also be used for a bridal shower as well.
Subscribe to:
Comments (Atom)
Create from a Kit
I'm always on the look out for these kind of cards. They are so easy to create from. By using a few tools and supplies from your sta...

-
I was playing around with my Cricut and I made these big tags using the Tags, Bags, Boxes and More cartridge. These jumbo tags (cut at 5...
-
Well, this was new to me. I have never made a wedding planner binder before. As a matter of fact, when I went online to get some ideas...
-
And Andrea, if you're out there, you know what I am talking about! I saw you at the funny farm today. There are only 13 more days of...


