Monday, May 31, 2010

Congrats, Grad!

Here are a few graduation cards I made using a black and silver theme. (Later this week I will show you the black and gold theme). I used my cricut for some of the pieces (the large "G" and the grad hat). I found the tassels at a local fabric store.

Friday, May 28, 2010

Retirements

Here are a few retirement cards I made for my retiring teacher friends. All the stamps are from Stampin' Up (some are retired). Most of the paper is also Stampin' Up, except the blue report card pattern paper (not sure about the company - it came in a huge pack of school paper from Joanne Fabrics).

Thursday, May 27, 2010

Cosmo Cricket

I found this paper at the convention in Novi and now I wish I had more. I just love it! This core paper is lightly embossed. With a little sanding block, you are are to reveal the embossed pattern. I love the black with white printing. The second card is embossed with school paper lines. I stamped the sentiment "Thank you" in white. I added a stamped apple from the set Country Apple (retired Stampin' Up). These cards are just over 4x4 in size. The paper pack comes with 4 embossed designs in 5 different colors (for a total of 20 sheets of paper).

Wednesday, May 26, 2010

Ice Cream

It is definately warm enough for these ice cream sundaes right now. Grand Rapids has had a bit of a heat wave! (And no air conditioner at school makes teaching 27 third graders really hard)! This card makes me think of summer. It is made with a Sizzix die and the Stampin' Up Sending Love Specialty paper (this was from the occasions mini that is no longer available). I actually bought extra paper because I loved the colors. I ran the sundae die through several times (each with a different color), then I cut the sundaes apart and pieced them back together. The swirl design on the "Close to Cocoa" paper is made with an embossing folder.

Saturday, May 22, 2010

Medallion

I have had the medallion stamp for a while and just have never used it. I made this card using versa mark and chalks. It was sort of fun, each one turned out different. I started out with the intention of using the colors old olive and brown, but I accidently put my sponge in the color "not quite navy" and I liked the results. I did a little stitching with my sewing machine. Then I thought it needed something for the center. I had these metal buttons from Jolee, but they were too bright, so I used the Adirondack alcohol inks (latte and gold) to tone them down a little. I think it did the trick. You can see in the picture the differences before and after.

Thursday, May 20, 2010

Tree-mendous

So I was at Joanne Fabrics last week and what did they have on sale? Cricut cartridges! Now of course I didn't need anything new and goodness knows, I just got back from the Novi convention, so what was I thinking... buying two new cartridges? But they were both so cute! This tree is from the cartridge "Give a Hoot". (This is going to be a fun one to play with). The paper is from the first card is from the Green Stack by DCWV and the second card uses paper from Cosmo Crickets "Mr. Campy" series.

Tuesday, May 18, 2010

Glimmer Mist

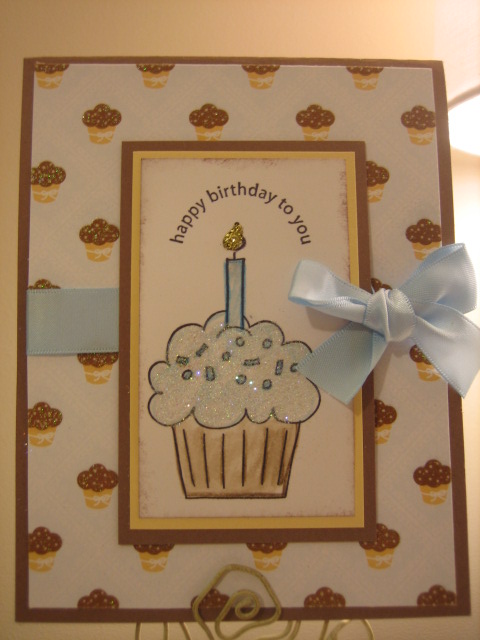
Here is another one of my "convention" finds. Glimmer Mist by Tattered Angels. (Other companies are also coming up with these glittery "spritz" sprays, including Stampin' Up). I have been checking these out and watching tutorials on these for about a year, but unfortunately, I haven't been able to find them in any stores. The Tattered Angel company was at the convention in Novi, so the hard thing was deciding what color or colors to start with. I decided on gold, pearl and bubble gum. I am not sure if you can see it in the photo, but this card is all glimmery. I used the set Upsy Daisy (Stampin' Up) and embossed it with white. The background is some ink and chalk. Then I added some of the glimmer mist over the top to add sparkle.

Sunday, May 16, 2010

Always

Here is another wedding card I had out at my workshops. This card is made with the heart from the current set "Always" from Stampin' Up. (I actually bought this set for the bird!) I heat embossed the heart 4 times with silver embossing and then cut them out (two with the border and two without). Then just use a dimension dot to layer them. I used an embossing folder for the background (white swirls on the white and swiss dots for the gray). I used the eyelet border punch for the front edge. Then just add the white organdy ribbon.

Saturday, May 15, 2010

Bride and Groom

It's getting closer to the "wedding" season. Here is a cute wedding card (did you notice I didn't say quick?!!) The cutting is a little time consuming (maybe because it took me so long to get the right sizes for my pattern and looking back at it, I think I could have done a better job on the bride's dress!) I found this idea on Splitcoast Stampers, but no pattern, so I created my own. I used the Bride and Groom Specialty paper from Stampin' Up (many of my demonstrator friends said "Where did you get this paper?" hee hee! Sometimes things are hidden in the catalog!) The paper is a bit more expensive and you have to buy the bride and the groom set separately, but the "look" of it is rather classy. It is hard to see in the picture, but the bride's dress also has diamond stickles on it for added sparkle. Thanks for stopping by!

Tuesday, May 11, 2010

Clip-it Up

Here is another little treat I got for myself at the convention last weekend. I have seen these racks (and thought they looked fun!). I love to organize and finally decided to give this a try. This is actually the "mini" size and it cost $42.00 at the convention. I can't really decide what to put on the rack, first I tried my clear stamps hanging off it. This was a good way to see everything and they would be much more accessible. Then I changed my mind and wanted to see what my individual cards looked like hanging on it. I thought this might be a good way to display them at my craft shows. I labeled the black divider tabs by categories. And that is as far as I got...maybe I will change it again! Or maybe I need a second one!

Monday, May 10, 2010

Acrylic Photo Album

Well, I just got back from a scrapbook convention in Novi, Michigan. It was fabulous. What a great place to learn so many techniques and ideas all in one place in a short time! Here is one of the projects we made in a class. This can be a photo album or a frame on display. I love working with acrylic and need to do it more! We learned little tricks about hiding adhesive when decorating both sides. I have other projects to show later this week. Thanks for checking in!

Sunday, May 2, 2010

Cherry Calendars

I have been busy playing around with chipboard again. These cherries are actually from a scrapbook chipboard album I found at Michael's. I had some of this fun cherry paper left from Stampin' Up and thought it would make a cute calendar. Not sure how well I like it though. The calendar is a little to big or overwhelming for these cherries (and the calendar is quite small). Next time, I think I will try a mini post it note over these. Oh well, crafting is trial and error! Thanks for stopping by. Check back again, I have some new projects I will be posting!

Saturday, May 1, 2010

Birthday Cupcakes

Here are a few cards that were offered at my workshop last night. (Hope everyone had a good time!) The pattern paper for the background came from a "mat stack" of glitter paper called "The Glitter Sweet" from DCWV (Joanne Fabrics). If you love cupcakes, chocolate and candy, this paper stack is for you! Very cute and glittery! It is hard to see in the photo, but the cupcakes in the background paper are glittery. I used the set "Crazy for Cupcakes" (Stampin' Up) and colored them with watercolor pencils. And of course, added dazzling diamond glitter! The blue one has Stampin' Up's new satin ribbon. The pink ribbon is organdy. Thanks for stopping by!

Create from a Kit

  I'm always on the look out for these kind of cards.  They are so easy to create from.  By using a few tools and supplies from your sta...