Friday, June 18, 2010

StoryTellers Club

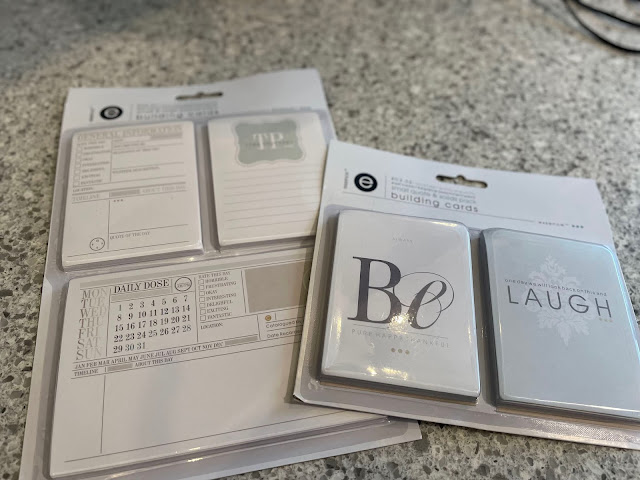
This is the package from the StoryTeller Club kit for this month that I mentioned in my last post. I found out about this company last year at the Mega Meet Scrapbook Convention in Novi. At their booth, if you signed up for the monthly kits, you could pick 6 single kits (a two page layout of paper and embellishments) for free. There is no purchase necessary and you can preview the kits before they send them (even though I never do, I like to be surprised!). And you can cancel anytime. Last year, I cancelled after about 5 kits (going back to school time for me and I didn't think I would have time to scrapbook). I went back to the Mega Meet convention and signed up again (and yes, received 6 more packs for free!!!). As you saw in my last post, I don't only use them for scrapbooking, but card making as well. I have decided this is my new form of scrapbooking - all in a kit and ready. I spend too much money shopping all the cute stuff and then stashing it somewhere never to be found when I am actually scrapbooking! My friend Teresa understands this! Sometimes we just think of ourselves as collectors, not scrapbookers! Look at all the stuff that comes in the monthly kit! If you want to learn more, check out their site StoryTellers Club. They are offering a great special (and it includes the paper from my previous post!)

Thursday, June 17, 2010

Keep it Simple

This has always been my motto - "Keep it simple!". I love the detailed, embellished cards, but I usually make very simple cards. For these cards I used cardstock from one of my StoryTellers Club kits. I have to tell you, even though I only scrapbook about two or three times a year, I still love this club of monthly scrapbooking kits. They have some of the most beautiful papers ever. Plus you get four sheets of each design in each kit (but more about that later, I will show you my most recent kit in a future post). So back to these cards. This paper was too beautiful to cover with photos, so I decided to make cards. The flower design was only in the corner, so I used that part of the paper for the cards. Love these colors together. I only added some white satin ribbon, a sentiment and some glitter glue to sparkle up the white part of the flowers.

Monday, June 14, 2010

Thank you and Good Bye

We had some sad news about our custodian the night before the last day of school (well, exciting for him, but sad for us!). He decided to take a different position with our district. He won't be our custodian any more, but we will see him periodically, as he took a district wide maintenance position. He was one of the first people I met at my new building last year, and he was extremely helpful with my move into the building all last summer. I never really thanked him for everything he did, so I made him this card (and one of the bags filled with chocolate covered cashews)and gave it to him the last day of school. I used the set "Totally Tool" (Stampin' Up). I stamped each of the tools on a colored piece of cardstock, and then colored the silver parts with a silver metallic marker (American Crafts). The background was made with the background stamp "Woodgrain" (Stampin' Up). The "screw" brads were from Hobby Lobby (Spare Parts).

End of the Year

Well, I made it through my first year of third grade! (This sounds like I am a student in third grade, well actually, I felt like the student some of the time!) I should say, I made it through teaching third grade for the first time! Here are some treats I made for my teaching neighbors. These bags are from Stampin' Up. The decorations I added are from the Simply Scrappin' set "Summer Home" (retired). I used the cardstock sticker borders and some of the small squares to make gift tags hanging off the ribbon (that I tied on the handle of the bags). The bags are filled with chocolate covered cashews (yum! I gave them all away so I wouldn't eat them!) Quick and easy gifts that I think looked rather classy! (and the point here is...whether you are a stamper, a scrapper or just like to make gifts, Stampin' Up's products can help you make these gifts quick and easy. All the colors coordinate!)

Tuesday, June 8, 2010

Happy Camper

Here is a little gift I made for my parent helper this year. I know the family just bought a camper and thought this would be a cute little thank you that the whole family could enjoy. I started with a take out drink carrier and covered it with pattern paper from the series "Well Worn" from the Paper Loft. The die cut sticker embellishments are from the series "Mr. Campy" from Cosmo Cricket. I put some filler in the center and then added chocolate bars, graham crackers and marshmallows. (I still need to make a matching card or tag to say "thanks").

Monday, June 7, 2010

Last Days of School

Here are a few projects I have been working on for the last few days of school. I thought these would make some fun little gifts for my teacher friends. I made a hanging post-it note holder, a set of cards, and a mini clipboard with post-it notes. The pencil was made with my Cricut machine using the "Locker Talk" cartridge. The fun ruler ribbon was purchased from Starlit Studio (online shopping).

Thursday, June 3, 2010

More Graduations

Here are a few more graduation cards (these with a gold theme). Pattern paper and a little gold embossing. Gold and black paper. Very simple, very easy cards.

Create from a Kit

  I'm always on the look out for these kind of cards.  They are so easy to create from.  By using a few tools and supplies from your sta...